It was primarily composed of a PVC pipe, a few layers of strategically placed foam and mounting board as well as a generous helping of epoxy clay to strengthen it up near the base.The build had inherent problems like the head drooped to one side a little and it tended to scarily flop about when handled roughly; but thankfully it survived that convention just fine.
As time went by the already haphazard build was getting slightly damaged on the head section and he also requested that I make the staff collapsible when I get to fixing it.

Basically what needed to be replaced was the staff itself, since the original one was a plastic pipe it had bent out of shape over the course of the year in storage, so we cut it off and set about making a new connector for the head of the staff.
First we went to the hardware store to get a new handle for the staff. This part was easy because the store already had ready made broom handles that were already sanded so we went with one of those. Then we got ourselves a pair of plastic pipe connectors that already fit the stick (because again, short on time and convenience) so the top can be unscrewed for easy transport and storage.
The new connectors fit very nicely but I had issues with how it looked. The staff's general look was fairly organic and I didn't like how angular the connectors were, so we set to work again. I also decided to reinforce the head itself with a layer of epoxy to strengthen it and stop it from wobbling so much, and gave what was left of the old connection a sanding.

After nailing down the respective connectors to the two separate pieces (one for the head and another for the staff itself) I cut a piece of thick leftover EVA foam and glued it to the bottom of the lower connector to provide some shape. When it dried I slapped on some epoxy clay and water smoothed it until I was happy with the distribution. I let it dry for a few hours till it was safe to touch before I got to the plastic connections themselves.
Being fairly angular they stuck out a fair bit on the staff, and using a rotary tool I had borrowed from another builder friend I shaved most of the angles off both connectors for a more organic feel
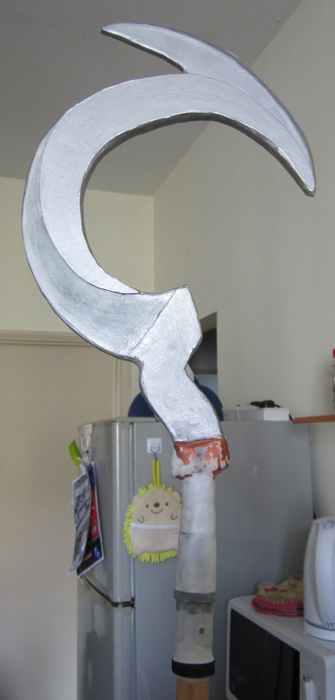
The top and the bottom again were given a wet sanding and another couple of layers of epoxy clay to cover the exposed sections and generally make it smoother. This part was quite messy because dealing with wet clay is already messy as hell, combine it with having to do it with a five-plus foot long stick didn't make it any easier.
I don't have an intermediate photo of where we finished it up and painted it all but the result was pretty good. We used a fair helping of Pewter Rub N Buff (polished later) on the handle and I touched up the head with it too; to blend in the newly epoxy hardened bits. The base of the staff was given two coats of coppery acrylic paint. When that was done we sealed the whole lot with a sealer to keep all the hard work from getting damaged. Overall the repair process took about a week of time, and the painting/drying on it's own took an extra three-ish days.
Both of us were quite satisfied that it was now sturdier and no longer had to bang the roof of my car when he was hitching a ride with me, but its a pity that the paint was so reflective it showed up as white in almost every photo.

If I were to bother the design anymore after this point it would likely be to add a bit of decoration to the entire staff to make it feel more mystical or something, but that's likely gonna be another fix for another year.
No comments:
Post a Comment